You might be wondering why your HP printer not recognizing ink cartridges when it was working fine the first time. If you are using third-party, generic or remanufactured ink cartridge, there is a big possibility that this issue is due to your HP printer's firmware being updated to its latest version. If you haven't made any changes to your printer, then this means that your printer's firmware has been automatically updated without you knowing especially if your machine is connected to your Wi-Fi.
My HP printer's firmware has been updated, what should I do?
As you may already know, these HP printer firmware updates will cause cartridge chip lock-outs resulting to HP remanufactured ink cartridges not recognized and will now only accept original or genuine ink cartridges.
If you wish to continue using third party HP 65 ink/ HP 63 ink cartridges or HP 65XL ink/ HP 63XL ink cartridges, you can check our HP printer firmware downgrade instructions' page for the step-by-step guide.
How to stop automatic HP printer firmware update?
To stop HP printer from updating automatically, kindly read and follow the instructions below on how to disable the auto update feature.
For Printers with Touchscreen Control Panel
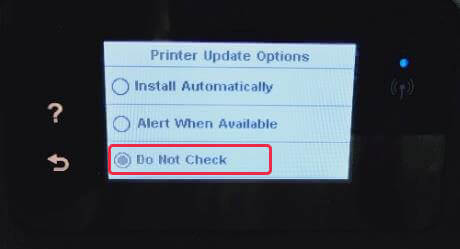
Procedure 1: From Printer's Control Panel
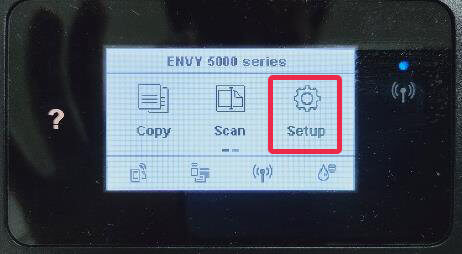
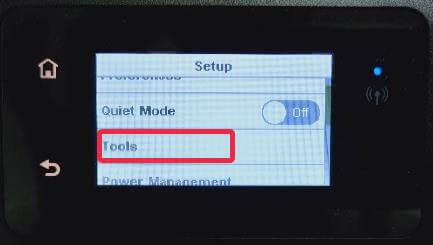
- Select "Setup" icon on your printer's control panel. From the list of options, choose "Tools".
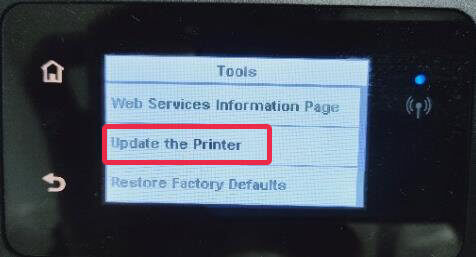
- Next, select "Update the Printer" on Tools display, and then choose "Printer Update Options".
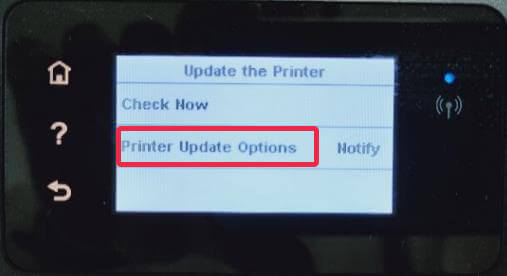
- Lastly, choose "Do Not Check" from the "Printer Update Options" display.
Procedure 2: From Printer Homepage via Browser
This method will work on HP network-capable printers and Wi-Fi Direct Printers. To access the printer homepage, you would first need to obtain the printer IP address, and enter it to a web browser address bar. IP address is the unique identification number assigned to the printer, depending on the network.
- While your printer is connected to the network, select "Setup" icon from your printer's control panel. From the list of options, choose "Network Setup". You should be able to see your printer's IP address on the top of the display screen.
NOTE: The IP address is unique for every printer depending on your network. The address shown on the photo below is for sample purposes only.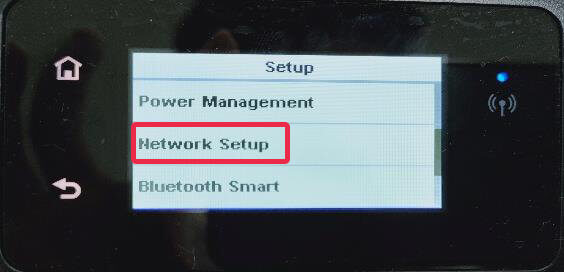
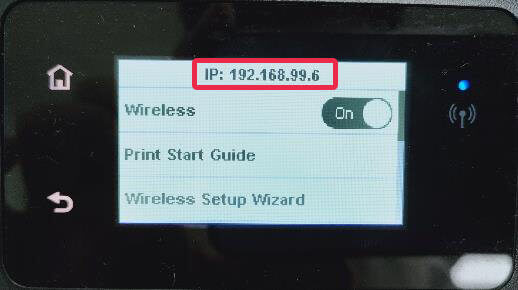
- Enter your printer's IP address on your web browser address bar (web address bar is where a website's link is usually located). You should be able to see your printer homepage once it's loaded.

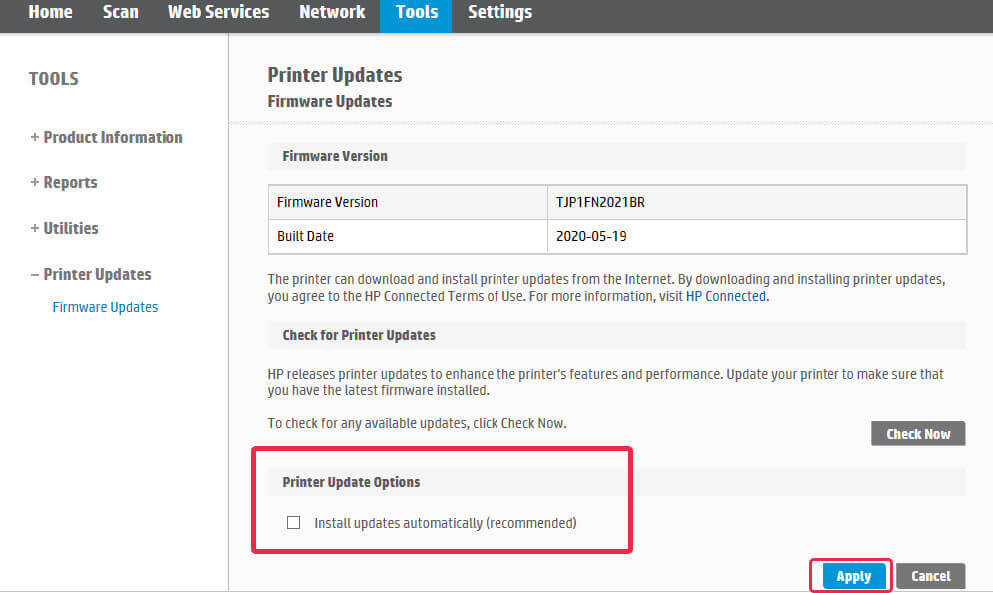
- Click on the "Printer Update" option from the home dashboard.
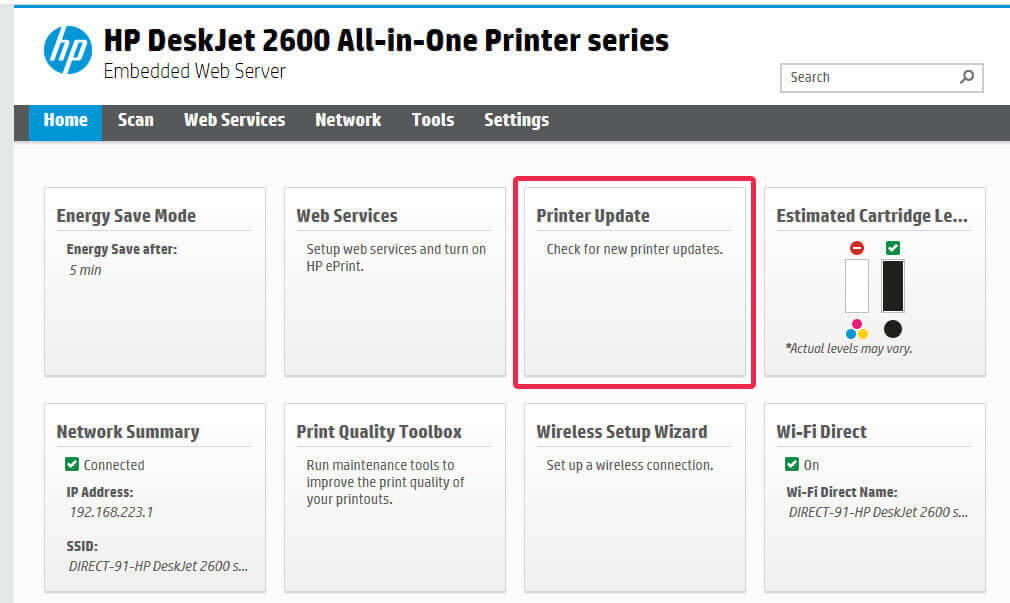
- Next, you want to make sure that the checkbox for "Install updates automatically (recommended)" on the “Printer Update Options” section is unchecked. This will disable the auto firmware update feature on your printer. Once you're done, click the "Apply" button to save the settings.
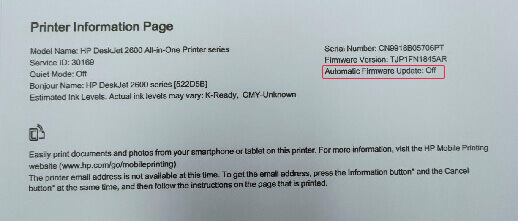
- You may also confirm the "Automatic Firmware Update" status by pressing the "i" button on your printer's control panel. It will print out your “Printer Information Page” which will show the status of your auto update setting.
For Printers without Touchscreen Control Panel
You can disable the auto update from your printer homepage via web browser. To do so, you would need to print out your “Printer's Status Report” first to obtain the IP address.
- Make sure your printer is connected to the network by pressing "Wi-Fi" and "Wi-Fi Direct" buttons on your printer control panel. For printers without the "Wi-Fi Direct" button, you may press on the "Wi-Fi" button only.
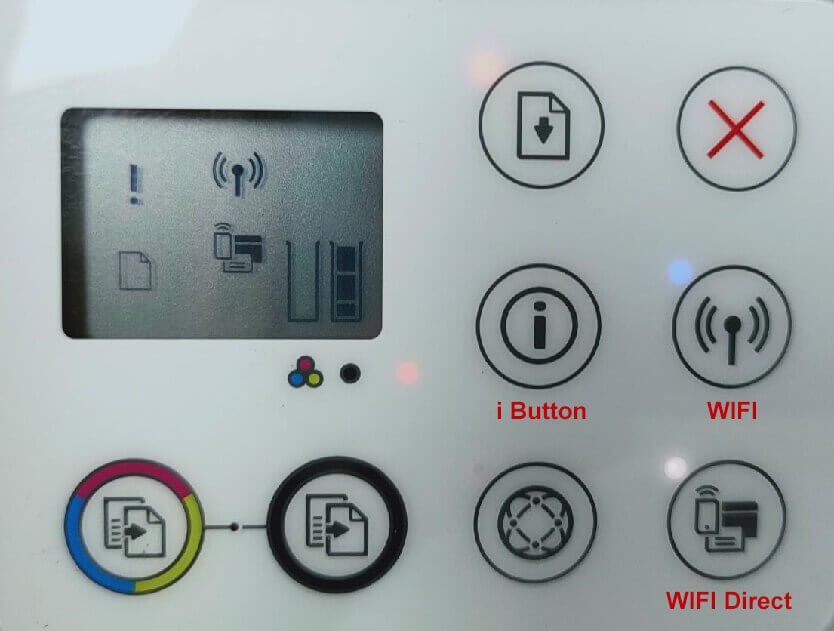
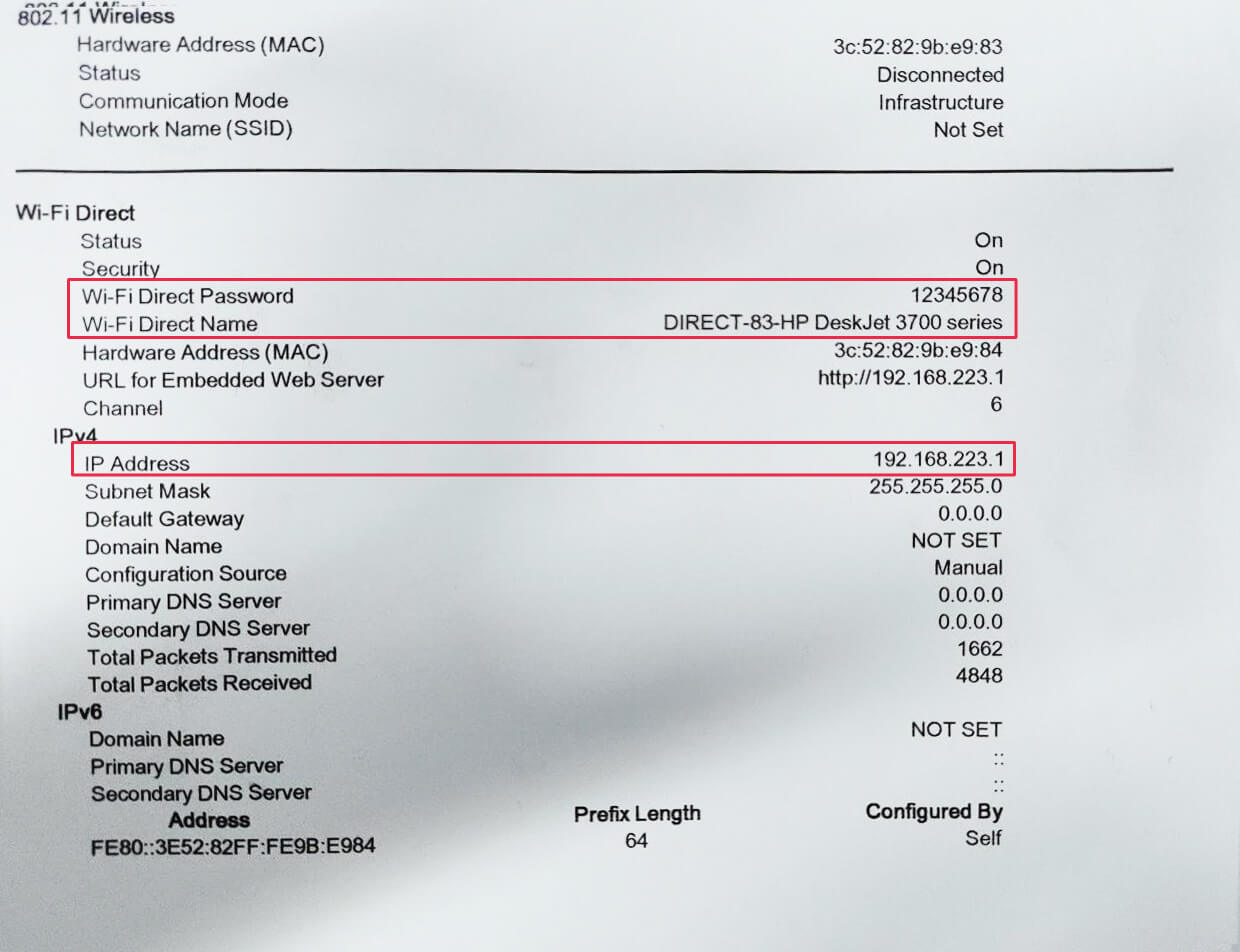
- Once your printer is connected to the network, you can print out your “Printer's Status Report” by pressing both "i" and "Wi-Fi" buttons for at least three seconds. On your printed report, you should be able to find your printer's Wi-Fi name and password, along with the printer's IP Address.
- Enter your printer's IP address on your web browser address bar (web address bar is where a website's link is usually located). You should be able to see your printer homepage once it's loaded.

- Click on "Printer Update" option from the home dashboard.
- Next, you want to make sure that the checkbox for "Install updates automatically (recommended)" on the “Printer Update Options” section is unchecked. This will disable the auto firmware update feature on your printer. Once you're done, click the "Apply" button to save the settings.
- You may also confirm the "Automatic Firmware Update" status by pressing the "i" button on your printer's control panel. It will print out your “Printer Information Page” which will show the status of your auto update setting.